Buildlog - A highly available kubernetes setup
2024-12-08

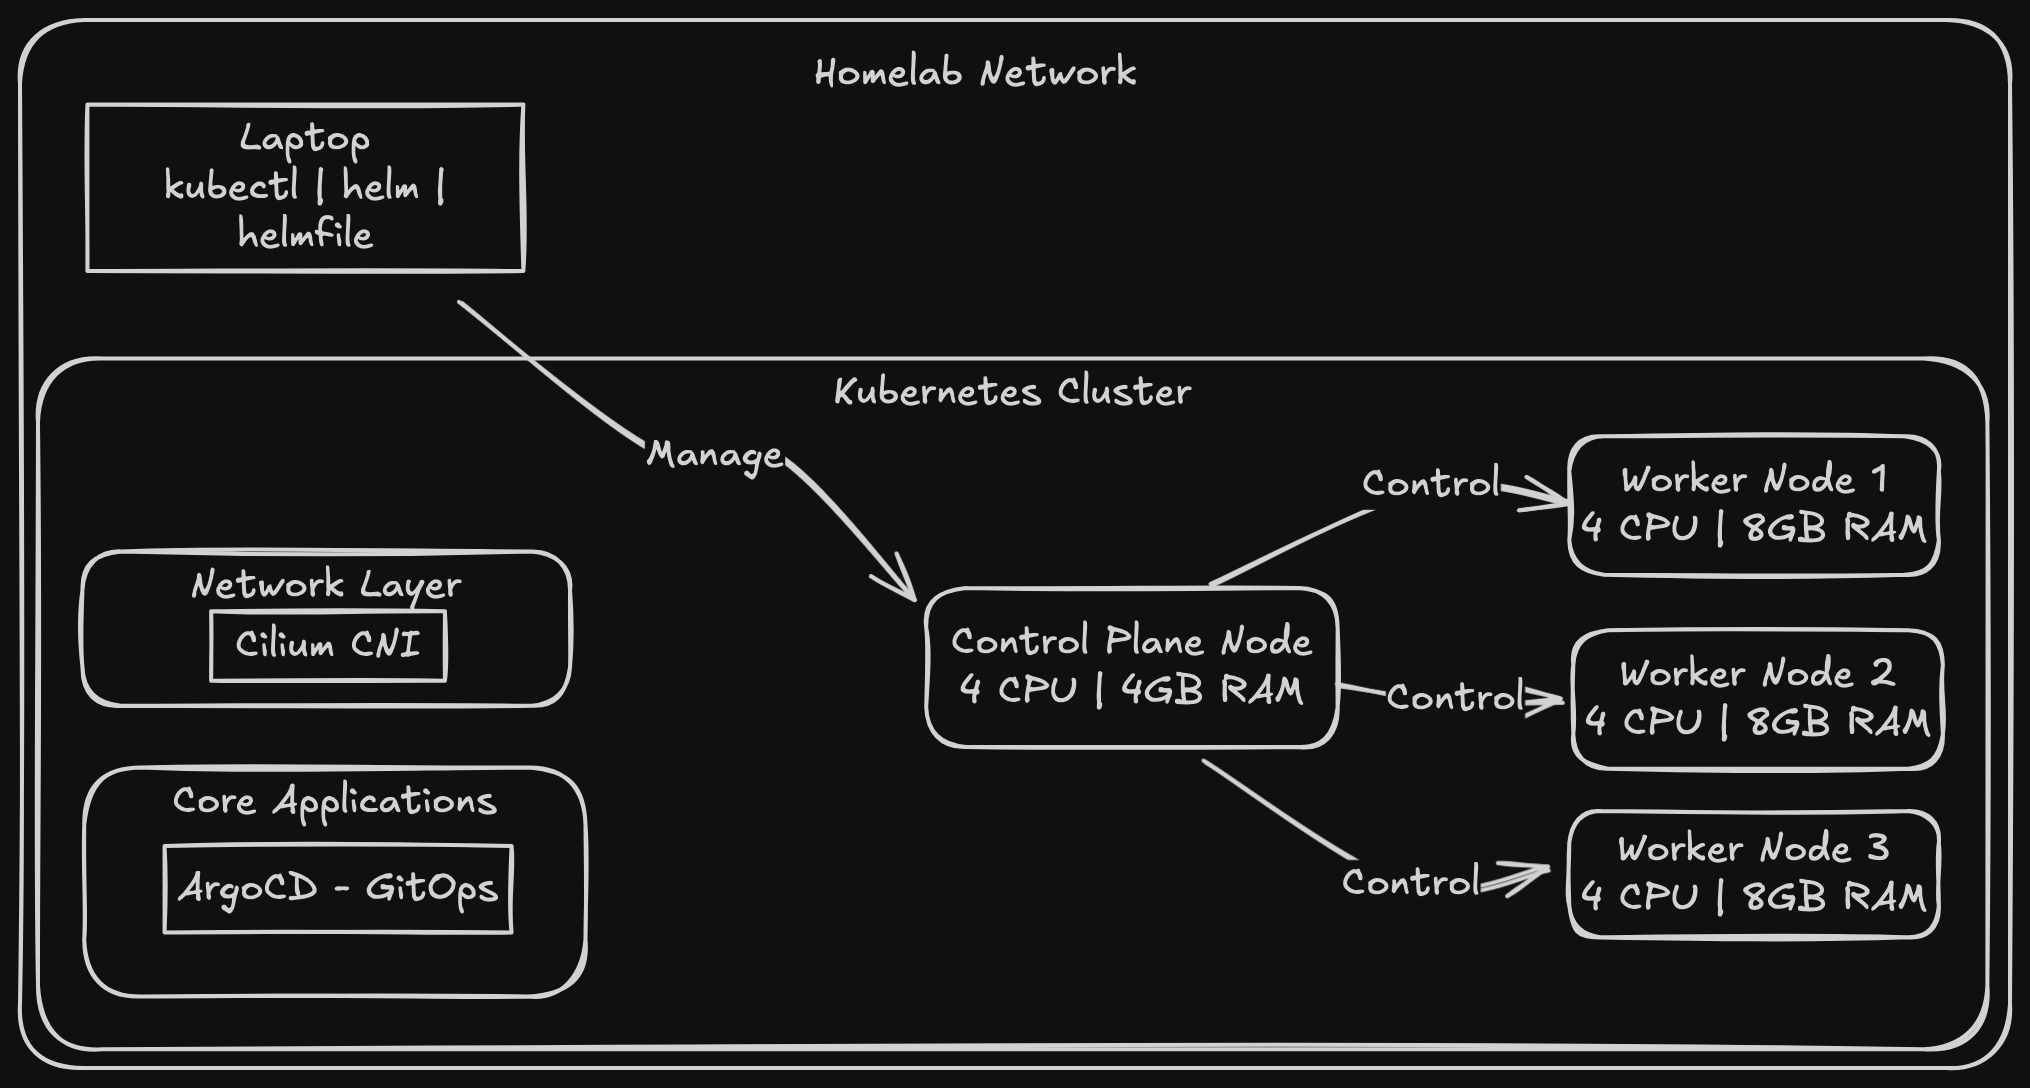
Remember this single control plane setup from last time? Well, I decided to level up.
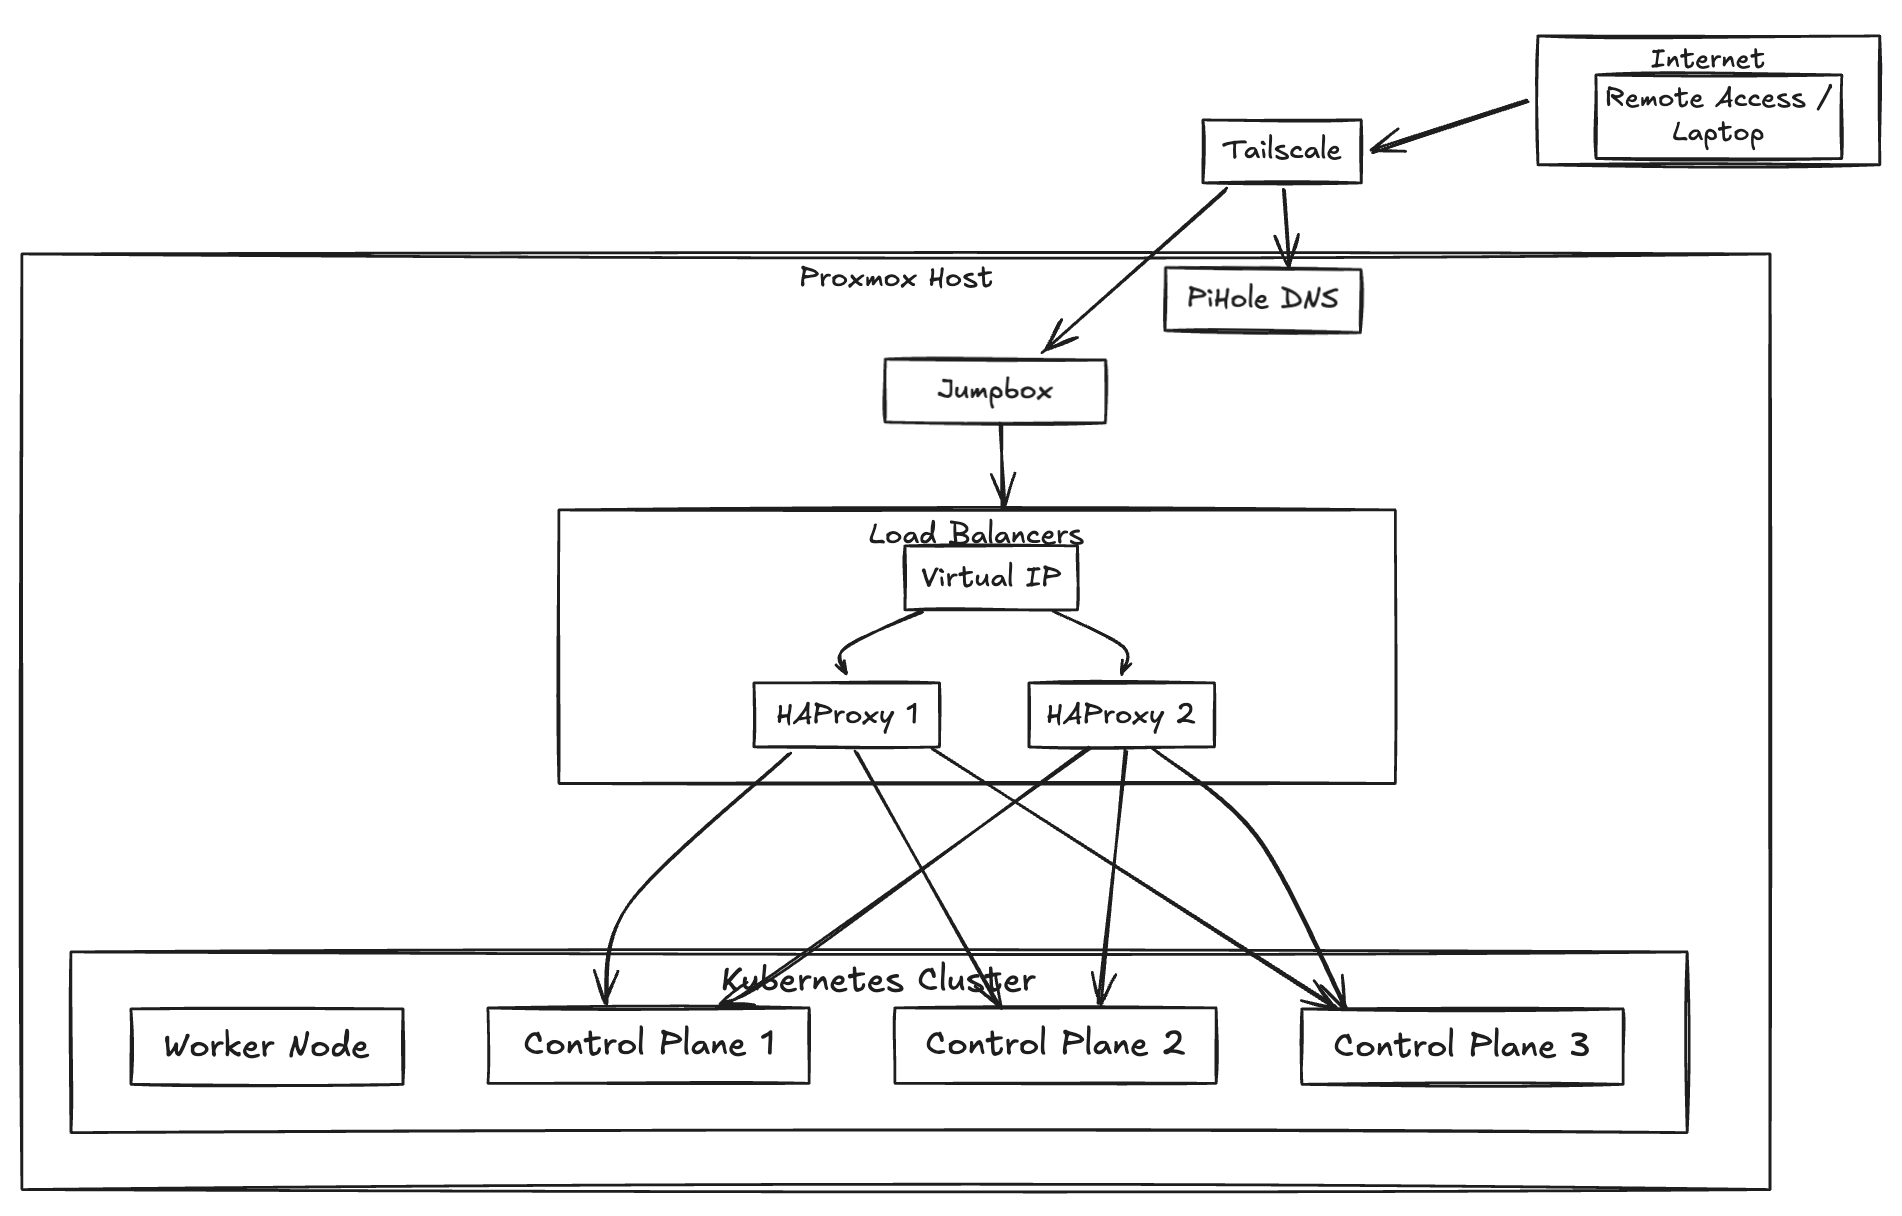
The New Architecture
The plan is simple (this is definitely an understatement):
- 3 control plane nodes
- 2 HAProxy load balancers with Keepalived for that sweet virtual IP
- All tied together with Tailscale for remote access
Tailscale setup is not included here
Setting Up the Load Balancers
First, let’s get HAProxy and Keepalived running. We need these on both load balancer nodes.
The virtual IP they provide (192.168.50.125 in this example) will be used as the control plane endpoint when initializing Kubernetes with
kubeadm initand join operations
sudo apt update && sudo apt install -y keepalived haproxy
Keepalived Configuration
Keepalived needs to check if our API server is alive, so we create this little health check script (/etc/keepalived/check_apiserver.sh):
#!/bin/sh
errorExit() {
    echo "*** $@" 1>&2
    exit 1
}

curl --silent --max-time 2 --insecure https://localhost:6443/ -o /dev/null || errorExit "Error GET https://localhost:6443/"
if ip addr | grep -q 192.168.50.125; then
    curl --silent --max-time 2 --insecure https://192.168.50.125:6443/ -o /dev/null || exit 1
fi
exit 0
And make it executable:
sudo chmod +x /etc/keepalived/check_apiserver.sh
Now for the Keepalived config that caused me way too much debugging time (/etc/keepalived/keepalived.conf)
vrrp_script check_apiserver {
    script "/etc/keepalived/check_apiserver.sh"
    interval 3    # Check every 3 seconds
    timeout 10    # Script timeout
    fall 5        # Require 5 failures for DOWN
    rise 2        # Require 2 successes for UP
    weight -2     # Decrease priority on failure
}

vrrp_instance VI_1 {
    state BACKUP    # Start as backup (both nodes)
    interface eth0  # Network interface
    virtual_router_id 1

    # Here's the part that got me: priorities need to be different!
    priority 100    # Slightly higher on the preferred master
    advert_int 5    # Advertisement interval
    authentication {
        auth_type PASS
        auth_pass mysecret  # Should be more secure in production
 }
    virtual_ipaddress {
        192.168.50.125  # Our floating IP
 }
    track_script {
        check_apiserver
 }
}
Pro tip: Set different starting priorities for your HAProxy nodes (like 100 for primary, and 99 for backup). When both have the same priority (e.g., 98), they can deadlock during failover. Since the weight (-2) decrements these values during health checks, keeping odd/even differences prevents them from reaching the same priority level and getting stuck.
Enable and start Keepalived:
sudo systemctl enable --now keepalived
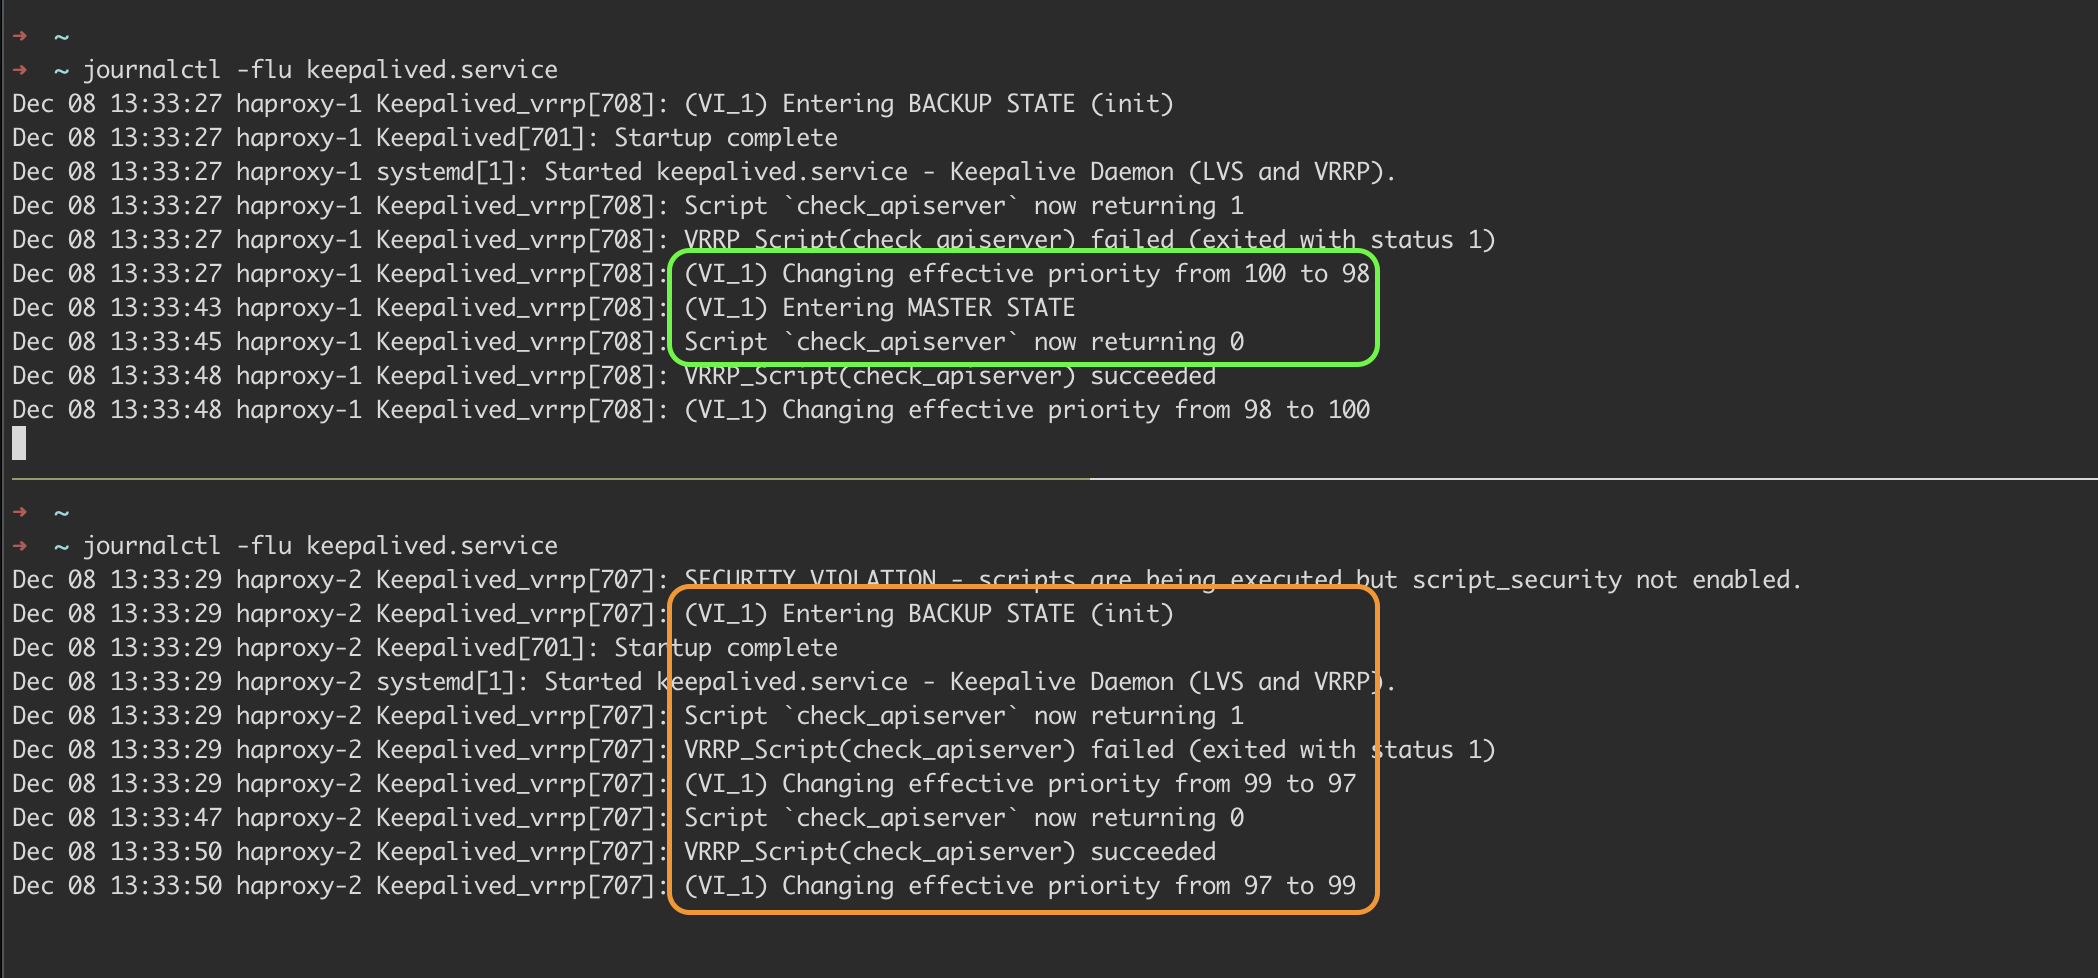
Taking a look at the logs using journalctl -flu keepalived.service we see that the virtual IP has been assigned to one of the nodes

and the instance with the IP attached has entered “MASTER STATE”
Note: when setting this the first time this will be in a failing because k8s and haproxy aren’t set up yet, i am running this command after the setup.

HAProxy Configuration
HAProxy here acts as a TCP load balancer, distributing incoming API server requests across our three control planes using round-robin scheduling, and also actively monitors their health status.
HAProxy config (/etc/haproxy/haproxy.cfg):
frontend kubernetes-frontend
 bind *:6443
 mode tcp
 option tcplog
 default_backend kubernetes-backend

backend kubernetes-backend
 option httpchk GET /healthz
 http-check expect status 200
 mode tcp
 option ssl-hello-chk
 balance roundrobin
 server controlplane-1 192.168.50.131:6443 check fall 3 rise 2
 server controlplane-2 192.168.50.132:6443 check fall 3 rise 2
 server controlplane-3 192.168.50.133:6443 check fall 3 rise 2
Enable and start HAProxy:
sudo systemctl enable haproxy && sudo systemctl restart haproxy
Kubernetes Time
Before starting the Kubernetes setup, ensure you’ve completed the prerequisite steps: disabling swap, loading kernel modules, and installing container runtime and kubeadm packages as covered in the previous post.
Now for the fun part. On our first control plane run:
sudo kubeadm init --control-plane-endpoint="192.168.50.125:6443" \ # use the virtual IP
    --upload-certs \
 --service-cidr 10.96.0.0/16 \
    --pod-network-cidr=10.244.0.0/16
The above command should be run only on one control plane and the rest control planes join it.
Once that’s done, you’ll get join commands for both additional control planes and workers. Use these to join your other control planes and workers.
For other control planes:
sudo kubeadm join 192.168.50.125:6443 \
 --token <token> \
    --discovery-token-ca-cert-hash sha256:<hash> \
 --control-plane \
    --certificate-key <cert key>
And for worker nodes:
sudo kubeadm join 192.168.50.125:6443 \
 --token <token> \
    --discovery-token-ca-cert-hash sha256:<hash>
And taking a look at the nodes, we see the 3 cps and the worker are there:

CNI and Friends
Like last time, we’ll use Helmfile for our deployments. First, install the helm-diff plugin:
helm plugin install https://github.com/databus23/helm-diff
Then, after reviewing what’s about to change:
helmfile diff
helmfile apply
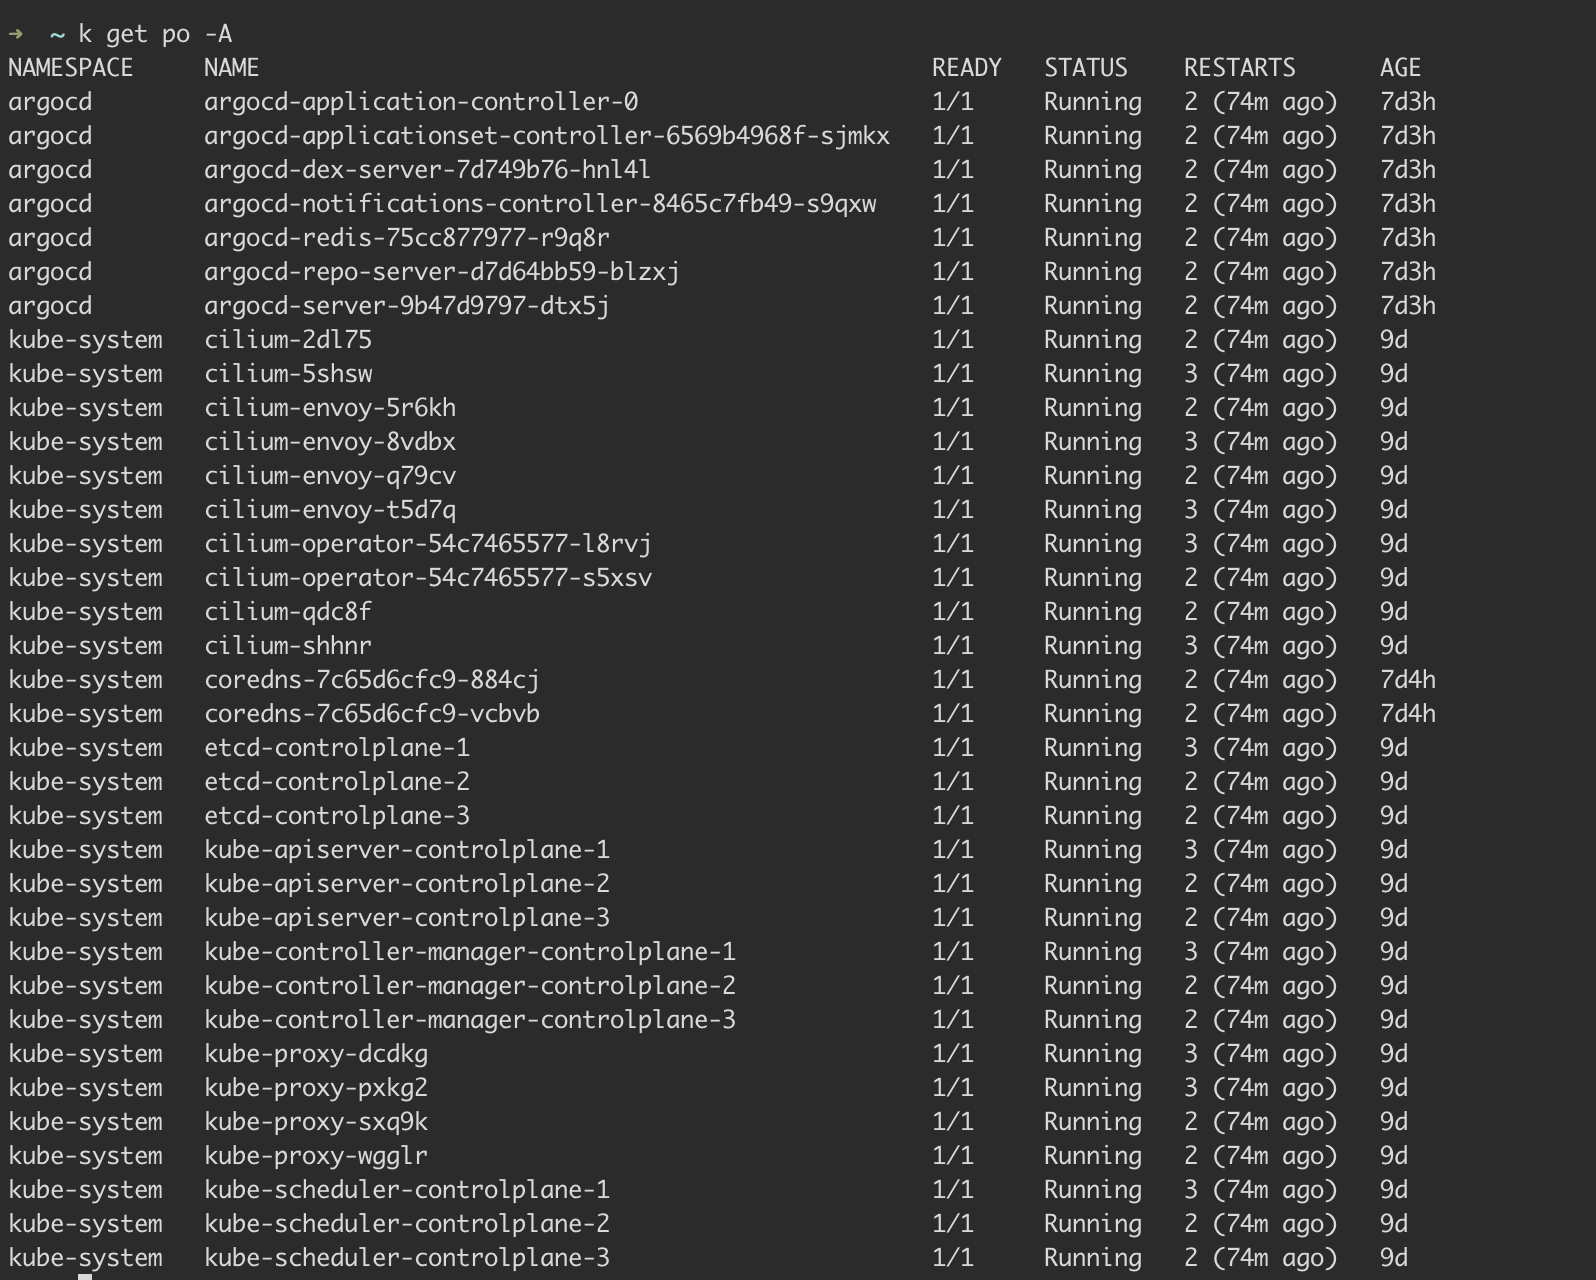
We can check if our pods are up and running with:

Notes and Gotchas
- The Keepalived priority should be different on each load balancer
- Keep those certificate keys safe - you’ll need them for joining additional control planes
- The virtual IP should be outside your DHCP range
- Test failover by bringing down your active load balancer - it’s fun to watch (when it works)
What’s Next
- Get workloads going, using argocd app of apps pattern (well I already did I just need to write about it)
